When you are doing something in your Chromebook like social media application or watching movies and you saw something you would want to show someone, then taking a screenshot is the most useful option. In case you do not know how to do so, then this blog will help you out. Here are several ways to take a screenshot on your Chromebook.
How to take a screenshot using buttons on Chromebook
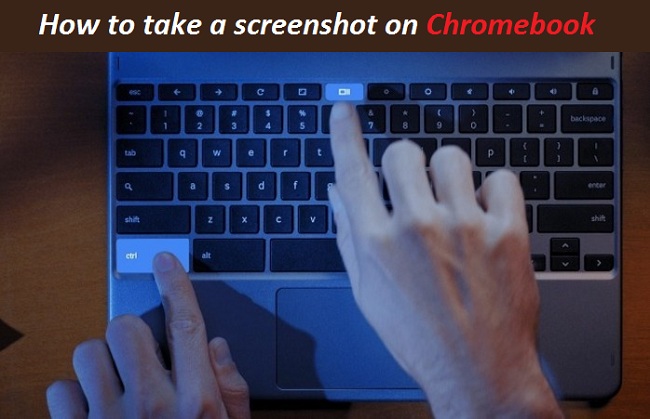
Using a button is a convenient method to take a screenshot on your Chromebook. Button combination is an easy way to take a screenshot on mobile, and it can also work on Chromebook by using volume and power button.
There are two methods to take a screenshot on chrome book with keyboards buttons.
- Ctrl + []]] to capture full screen.
- Ctrl + Shift + []]] to capture that particular portion you want to take a screenshot.
In the 2nd option, you can use your mouse to navigate on your screen to select a particular area you want to take a screenshot of. This command is helpful for that moment when you are want to capture a little portion of your screen.
If you are using the different external keyboards in your Chromebook, the above command does ‘not work; then, you can use these steps.
- Ctrl + F5 to capture full screen.
- Ctrl + Shift + F5 to capture that particular portion you want to take a screenshot.
If you are using your Chromebook in tablet mode or you wish to take a screenshot, then you can do so. In the tablet mode the keyboard is not active, so need to Click the power button + volume down button to take a screenshot.
This method takes a screenshot of your full-screen preview. In the tablet, there is only one option to take a screenshot. If you want to take a specific portion, then you can crop the taken screenshot according to your need, or you want to share with someone.
How to take a screenshot with Stylus
Stylus option only for those users who are using Samsung Chromebook plus, Pixelbook, Pixelbook Pen, and Chromebook have stylus features.
Here you can use your pen to take a screenshot. Open the menu, now, you can take a screenshot withdrawing on your screen, or you can also take a full screenshot of the entire screen.
How to take a screenshot using other application
In-built features to take a screenshot on Chromebook performed well. Buy you wish to use some other option. You can install other applications that can help you to take a screenshot in many ways and providing lots of features while taking a screenshot.
Three Additional Options
Nimbus Screenshot & Screen Video Recorder – it including various features where you can take a screenshot, edit your screenshot, record your videos.
Scrn.li – it can take a screenshot of your entire screen and selected part that you want to take.
FireShot – it can take a screenshot of the entire screen, providing an Editing tool that can be helpful to crop your screenshot and also a send screenshot option that can use to send your screenshot to Gmail.
Conclusion:-
All of the extensions above mention are free to the user. If you want to take a regular screenshot, then you can use the above extension to make a creative screenshot.
Jeniffer Leio is a technical writer and her background is in engineering. She has been covering IT-related subjects like AI, Operating Systems, Latest Trends, Software, Cybersecurity, and Printer Support for a long time. She writes blogs, guides, white papers, and essays on several platforms. Her appreciated work mainly comes on brother printer support.
Comments
Post a Comment