
HOW TO GET THE MOST OUT OF YOUR FITBIT DASHBOARD

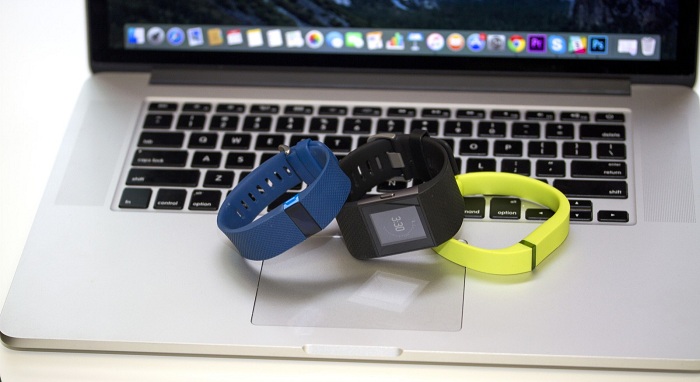
Fitbit is a wearable tech that is used for tracking the activity throughout the day. If you are a fitness freak, then this will help you track your fitness goals. From the Fitbit dashboard, you can check the statistics, goals, and insights. This can be accessed from a desktop as well.
HOW TO GET THE MOST OUT OF YOUR FITBIT DASHBOARD
How to Set Up Fitbit Dashboard?
  1. First, you need to download the Fitbit app. This app is available for free in the app store. Ensure that the software has been updated to the latest version, or else you may face problems linking your phone and Fitbit account.
  2. You need to turn Bluetooth on before proceeding.
  3. When the installation of the app is over, open it.
  4. In the first app screen, tap on the Join Fitbit option.
  5. Now, you will have to select your Fitbit tracker.
  6. Simply key in the details. For keeping an accurate track of stuff such as calories burnt, you will have to add some details to Fitbit.
  7. Add your name, date of birth, height, weight, and gender.
  8. Tap on the Save button.
  9. Now, you need to create a new account by entering your full name, email address,  and password.
  10. Agree to the terms of service and privacy policy and tap on Create an account.
  11. Now, simply pair your Bluetooth device to the Fitbit account. Place the Fitbit tracker near the device.
  12. Go to the device settings, and choose the Fitbit tracker for pairing it to the device.
  13. Get back to the Fitbit application and get started.
  14. Simply synchronize the computer that does not have Bluetooth. You have to make use of the wireless sync dongle that you received along with the Fitbit. Place the tracker near the computer, and insert the dongle in the USB slot. The devices will get paired automatically.
  15. Follow the prompts shown on the screen.
  16. In just a minute, your Fitbit tracker will get connected to your account.
How to Use the Fitbit Dashboard?
  1. Launch the Fitbit app. You can open it on the desktop or phone. However, ensure that Bluetooth is turned on, the tracker is near the device, and the wireless dongle is plugged into the USB port in case the desktop does not support Bluetooth.
  2. Now, you can customize your Fitbit dashboard by adding tiles. To add tiles, click on the Menu button at the left corner of the screen and tap on the box next to the tile you want to add.
  3. At the upper side of the dashboard, you will see a pull-down menu named Log. Below this menu, you will see an option called Food. Here you can enter your present and coveted weight.
  4. In the next screen, you can select a weight loss plan.
  5. You can also keep a record of your water intake. Just tap on Log and select water.
  6. To remove redundant or useless tiles, just place the cursor on the lower region of the tile you intend to remove, click on the hear icon and choose the Trash icon for removing the selected tile.

Comments

Popular posts from this blog

How to Troubleshoot TP-Link Router Error Code 5008?

TP-link is the best router for connecting your device from the internet which is easily available in the market. The TP-link is the Chinese company manufacturing computer networking based products and sell them across the globe. It was first launched in the year 1996 by two Chinese brothers. The company started its first international expansion in the year 2005. However, the Tp-link products consist of wireless routers, mobile phones, ADSL, DSLR, routers, switches and many more. Therefore, due to the variety of products it is popular among the users and most demanded router to connect with the internet. Though, it is not always flawless and shows some technical errors which users can’t be able to solve. However, one such error is TP-Link router error code 5008. But this error code is quite common and encounters by lots of TP-Link users. Nevertheless, the TP-Link router error code 5008 is commonly caused by incorrectly, or wrong configured system settings, or it might occur due

How to Get Rid of Samsung Printer Error Code 11-1313?

Printers are the most used device which has been used by multiple of users across the globe. It helps users in printing all document into a piece of paper within seconds and in pocket-friendly prices. However, these days printers are offered by many different brands, in all the brands, Samsung is the renowned name for offering advanced features and a wide range of printers around the world. Apart from various models and advanced technology features, it’s customer service team is highly trained and experienced. Although Samsung is a reliable and most trusted brand for serving the best quality product and anyone can access the Samsung printers without any difficulty. Many times, while operating the Samsung printer users might face trouble with the error code 11-1313 which displays and your printer immediately stops working. Generally, this error caused due to misconfigured system files which creates the registry errors within the operating system. Nevertheless, this printer error c

How to Install Lakka OS and Play Classic Video Games on Windows PC

Want to play your favorite childhood game on your Windows PC? Many of you’ve grown up playing classic video games, possibly sometimes you miss them and wish to play again. But, they are for a specific type of system that isn’t available in this era. Here is a way “Lakka OS” that turn back the clock and let you enjoy that moment once again. You just require a few things, a spare system, a USB flash drive of a minimum 512 MB capacity, a USB game controller, and a good internet connection to do so. Here is how to install Lakka OS and play classic video games on Windows PC Download Lakka First, you need to download the Lakka OS file. There is a separate file for 32-bit and 64-bit operating system.  Select and download the correct file that your CPU supports. Download links for both types of CPU architecture are given here, check your system information and click the right link. For 32-bit: click “le.builds.lakka.tv/Generic.i386/Lakka-Generic.i386-2.0.img.gz”. For 64-bit: clic